Last spring, when I was heading out of Home Depot’s garden center with my hands full with rose bushes, I saw one of my friends at the check out counter. After a small chit-chat, I asked her what she was there for. Her cart was full of most commonly grown vegetable and herbs plants. There were easily 15 to 20 of them! I asked her why she isn’t growing her own seedlings, because it was a no brainer for me ($2.99/plant x 15 = $45.85 + Tax. I could have a bed full of plants if I invest that much in seeds!). I was taken aback when she replied “Oh, it’s one and the same! You either pay for the plants or pay for the gazillion seed starting supplies!” I wanted to scream “Nooooooo! It’s not one and the same!” But I didn’t. It did tease my mind to write about this myth.
If you are not convinced why you should start your own seeds, rather than buying plants from nurseries and garden center, you should read my post: Why grow your own seeds.
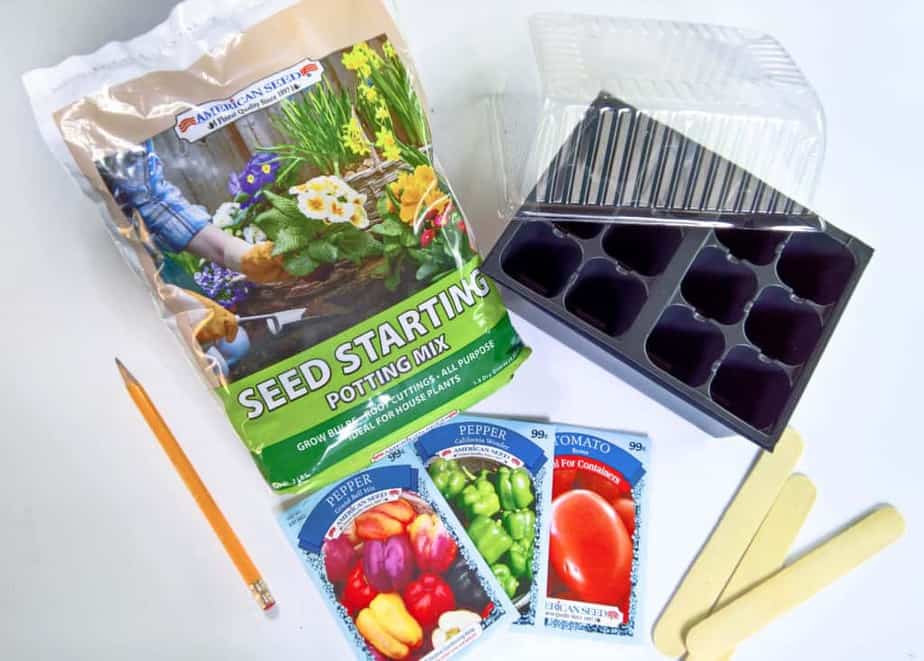
Anyway, the list of the things you need to start your seeds indoor is pretty simple. Read on.
1. Seed starting Tray + Cover
The seed starting trays come in multiple sizes. Some has a few large cells whereas some has many small cells. Depending upon what you want to grow, and how many plants you want to grow, decide upon the size. My Preference is a tray with few large cells. One tray per variety of seeds. It will be easier to mark the entire tray than marking individual cells.
Most of the seed starting trays come with a transparent plastic dome. The dome retains the humidity which helps speed up the germination process. Remember to take out the dome once the majority of the seeds germinate. Not doing so will encourage ‘Damping off’ disease on seedlings.
2. Seed starting mix
Don’t be tempted to fill the seed trays with garden soil. The garden soil is full of bacteria and pathogens that can inhabit the seed’s germination or attack the seedlings. You need a seed starting mix which is mostly made up of coco coir or peat moss. Both of these are excellent water retainer. These mediums are easier for the seedlings to penetrate and expand their roots.
3. Seeds
Well, you can’t start the seeds, without the seeds, can you? Most of the big box garden stores, nurseries and grocery stores have a rack full of seed packets. There are many online seed companies that sell all kinds of seeds, such as: Baker Creek Seeds
It’s up to you if you want hybrid seeds or heirloom seeds. Organic seeds or generic seeds. Just don’t go crazy, if this is your first-time seed starting endeavor. Trust me on this one, you can easily get lost here!
4. Seed Tray/Cell marker
Do not skip over this. Once you saw the seeds, all the seed tray will look the same for the first few weeks until the true leaf appears. How will you know what you planted in each tray? I use popsicle sticks to mark the trays/cells. They won’t last for long, but they are inexpensive and serves the purpose. You could use label maker to make custom labels or anything else that can help you identify and differentiate between the seedlings.
5. Pencil
I use a pencil for two purposes:
- Writing on the popsicle stick. A pen or permanent marker will bleed the ink, once the popsicle stick is in wet soil for a few days. Writing with a Pencil eliminates that problem.
- I use the other end of the pencil to pock holes on the soil for the seeds.
There you have it! All of these combined will be much cheaper than buying the readymade plants. Yes, you have to put in some love and efforts, but hey, that’s the fun of it! Watching your babies grow in front of your eyes!
How are you starting your seeds this year? Please share your tips and ideas with me by leaving a comment below!