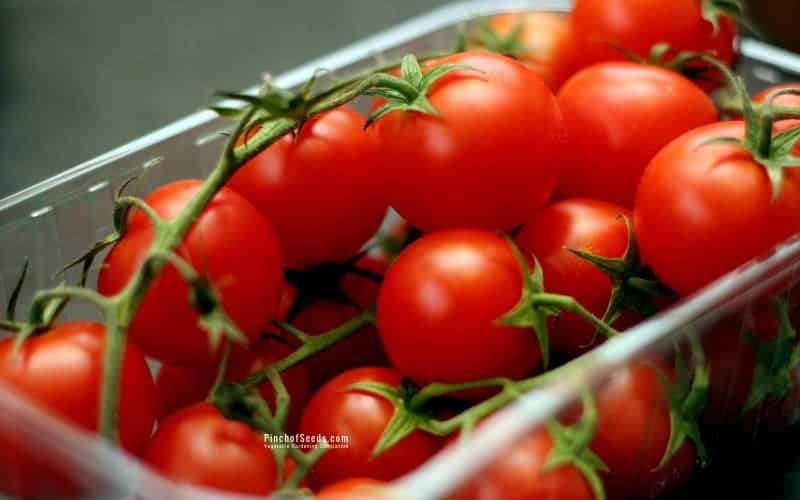
Tasting a freshly picked homegrown tomato is nothing short of sampling a piece of heaven! Try growing your own tomatoes this summer, and you will see what I mean!
Tomatoes are one of the easiest vegetables to grow in a home vegetable garden. With little preparation before planting and with regular care, you will have a bountiful harvest of homegrown tomatoes all season long! If this is your first time growing tomatoes, no worries! Let me show you how to grow tomatoes in your garden.
How To Grow A Tomato Plant:
Whether you started your tomato plant from a seed, or planning to buy a start plant, before you take out a shovel to dig a hole for planting tomato, consider when and where you are going to plant it. Little pre-planning now will reward you with healthy and productive tomato plant later.
When to plant Tomatoes outside?
Tomatoes are sub-tropical plants. They require the average daytime temperature above 55degree Fahrenheit and nighttime temperature above 45degree Fahrenheit to grow optimally. Don’t just go by the last frost date of your area. Wait at least a week or two longer before planting the tomatoes outside in the garden.
Planting the tomatoes too early in the spring will stun the growth of the tomato plants and will delay the maturity.
How much sun do Tomatoes need?
Tomatoes need about 8 to 10 hours of direct sunlight. They grow best in full sun location, but some varieties may survive little shady area or afternoon sun. Since the tomato plant can grow as tall as 7 feet tall, plant the tomatoes on North side of the garden bed, so they don’t shade out other smaller plants.
If you are planting tomatoes in an elevated raised planter with legs, locate the elevated planter box in a location where it receives 7-8 hours of sun daily.
How to prepare soil for a Tomato plant?
Tomato plant likes loose, well-drained soil which is high in nutrients. Also, make sure the soil is well drained and leveled. The roots of a tomato plant go deeper than other vegetables, so ideally 8 to 12 inch height for a raised garden bed is recommended.
Tomatoes like soil PH between 5.8 and 7. Before planting, do a soil pH test of your raised bed, garden bed or potting mix. Based on the pH test result, amend the soil to adjust the soil pH between 5.8 and 7.
If planting a tomato plant in a pot, make sure the container is at least 12 inches wide and 16 inches deep. Use the best available potting mix for growing tomatoes. I have had great success growing tomatoes in this 20″ planter with organic potting mix.
Determine spacing between Tomato plants:
Indeterminate variety of tomatoes grow tall and wide. Make sure to give them plenty of space to grow. The leaves of two adjacent plant shouldn’t be touching each other. This should provide ample air flow between the plants and leaves which will help eliminate many airborne diseases on the tomato plants.
The Square foot gardening techniques suggest 12” of spacing between the tomato plants. In my experience, that distance is too close for pests and diseases to spread from one plant to another. You should be prepared to spray insecticide and fungicide to control the pests and diseases spread. I recommend planting tomatoes 18 inches to 2 feet apart in a raised bed or a garden bed.
How To Plant Tomatoes Outside:
| Step | Instruction |
| Dig a hole about 6” deep and 1.5 times wider than your tomato starter plant pot. | |
| In the hole, put one handful of crushed eggshells, 1/2 cup of organic granular fertilizer, 2 tbsp of rock dust, and ½ cups of earthworm casting. Eggshells provide Calcium, which prevents ‘Blossom End Rot’ on tomatoes. Granular fertilizers break down slowly over time. Tomatoes need higher Phosphorus and Potassium than Nitrogen. I prefer Jobe’s Organics Vegetable & Tomato Fertilizer. Rockdust provides micronutrients and trace minerals, which boosts immunity and makes tomatoes sweeter. Worm castings adds fluffiness to the soil while adding nutrients and baby earthworms to the ground. This earthworm casting is the secret of my bountiful tomato harvests each year. | |
| Mix the nutrients and fertilizers with the soil in the bottom of the hole. Make sure everything is thoroughly mixed, and no one additive is easily identifiable anymore. | |
| Gently take out the starter plant from its container. Make sure not to pinch or grab the stem of the plant too hard. If the stem is damaged, the plant will not recover from it. | |
| Check the root ball of the plant. If the roots of the plants are growing in a circular direction following the container shape, then they are root bound. Gently shuffle the roots. It’s okay if a few roots break. It’s actually good for the plant. This will encourage the new roots to spread wide and deep. | |
| Remove all lower leaves from the starter tomato plant. Just leave two to three top leaves. Put the plant in the planting hole, burying the root and the stem, leaving only the top leaves outside the planting hole. New roots will shoot out from the buried stem part, making the plant stronger and grow faster. | |
| Fill the planting hole with the soil that you took out when you dug the hole. | |
| Gently press the soil to remove any air bubbles left or trapped between the soil. | |
| Water the tomato plant thoroughly, making sure not to wet the leaves. Wet leaves attract pests and cause problems for the young plants. | |
| Provide proper support for the tomato plant. Indeterminate and cherry tomatoes grow very large- about 7 to 8 feet tall in hot and humid weather. Use stake, cage or trellis to support your tomato plant. |
How To Care For The Growing Tomato Plant:
Here are the tips and best practices to ensure healthy and productive tomato plant:
1. Watering:
Tomato plant thrives with maintained moisture level in the soil. Make sure to water your tomato plants regularly and deeply. It is better to water the tomato plants every other day, drenching the ground near the root area, than shallow watering every day.
If the tomato plant is growing in a container, here is a detailed guide with information on how to water tomatoes growing in a pot.
2. Mulching:
Tomato plants are heat-loving plants. They like their roots to be warm. It is a good idea to put a plastic weed control fabric or mulch at the time of planting the tomato. Alternatively, spread straw, wood chips or rocks around the tomato plant to maintain the moisture and heat level in the soil.
3. Pruning:
Unless you are planning to raise your tomato plant without any support, it is recommended that you pinch out suckers from tomato plants. Suckers are the new shoot developing from the center of an existing leaf and the main stem. If left un-pruned, this new leaf will become another main stem of the plant.
Pinching out suckers mean you’ll have only one main stem of the tomato plant. This will keep the tomatoes growth in control and channel its energy in producing more flowers and eventually fruits, than producing more leaves.
When the tomatoes are about 18” tall, it’s a good idea to remove the lowest 2 to 3 leaves. Removing the leaves closest to the ground will reduce the chances of getting any soil-borne infections on the tomato plant.
4. Fertilizing:
Tomato plants are very heavy feeders. For best harvest, in addition to the fertilizer application when planting a tomato plant, it should be fertilized at a regular interval after it is established at the permanent place.
If using liquid organic fertilizer, a mild dose of compost tea like Plant Magic Plant Food or Fish and seaweed fertilizer every two to three weeks is recommended.
If using granular organic fertilizers like Jobe’s Organic Tomato Fertilizer, apply the fertilizer at the rate instructed on the box, every four weeks.
Common Tomato Pests And Diseases:
It is better to provide optimum growing conditions and protection to your tomato plant, then to fix the problems later once faced. To protect the tomato plant from the pests and fungal diseases, apply insecticide and fungicide sprays bi-weekly. Here are the DIY recipes for Neem Oil sprays, to make your own, natural and effective pest control spray.
Tomato Blights:
Tomatoes are prone to Early Blight or Late Blight. They are fungal diseases, which spread through splashed on rainwater, insects or infected garden tools. Make sure to provide good air circulations around the root and stem. Keep the garden bed tidy and free of weeds.
Tomato Horn-worms:
Tomato Horn-worms are a common tomato pest. Inspect the plants regularly for this or any other kinds of pests. Handpick and dispose of the horn-worms. While young, protect the tomato plants with a row cover.
Aphids:
Aphids are tiny little flies, either green or black in color. They chew on the leaves of the tomato plants. Use insecticide spray (here’s the instructions to make your own insecticide spray) to rinse away the Aphids. Planting Marigolds around tomato plants are also known to repel the Aphids.
Other Tomato Conditions:
Blossom End Rot:
When the bottom of a tomato fruit rots, without any insect damage, it is called “Blossom End Rot.” It is not a disease, it’s a problematic condition. This occurs when there is not enough Calcium in the soil, or when the tomato plant is unable to consume the available Calcium.
- Apply Garden Lime to the garden bed where you are planning to grow the tomatoes four weeks before planting.
- Putting crushed eggshell in the planting hole can also help.
- Spray the tomato leaves with water mixed with Epsom Salt every two weeks. Epsom Salt adds Magnesium to the soil, which makes the Calcium available for the tomato plants to use.
Cracked or Split Tomatoes:
Most of the large, heirloom tomatoes are prone to crack. This happens when the tomato plant gets too much water too quickly, for example after heavy rain. There is nothing wrong with the cracked tomato fruit, you can still use it for fresh eating. Picking nearly ripe tomatoes before the storm can prevent the cracking.
Tomato Harvest:
Harvest tomatoes when the fruits change color from green to red or pink, and they are a little bouncy when lightly squeezed.
If You’re expecting storm or a frost, it’s a good idea to harvest the tomatoes that have changed color, even if it’s not entirely red or pink yet. Just put them in a paper bag and place the bag on your kitchen counter. They will ripe in a few days.
Tomatoes store well for a while in a cool, dry place with good air circulation.
If you follow the above steps, you are on your way to growing amazing tasting homegrown tomatoes. If you still have any question or concern, please leave me a comment below, and I will try to answer as soon as possible.
Happy Gardening!
Last updated: 4/10/2021